Share
Pin
Tweet
Send
Share
Send
Materials for work:
• Detachable zipper larger than the length of the item (or old zipper) - 1 pc.;
• Pliers, large needle, matches, sewing machine, scissors.
Stages of the work:
The first stage: we disassemble the broken fastener.
We poke the “teeth” of the broken lightning with a large needle and shift them to the side. "Cogs" are easily removed from the fabric base of the clasp. If you can’t get rid of them with a needle, you can use pliers and pull off the “cloves”. When using pliers, it is necessary to capture only the upper part of the “clove” with them, so as not to tear and damage the fabric base on which they are held.
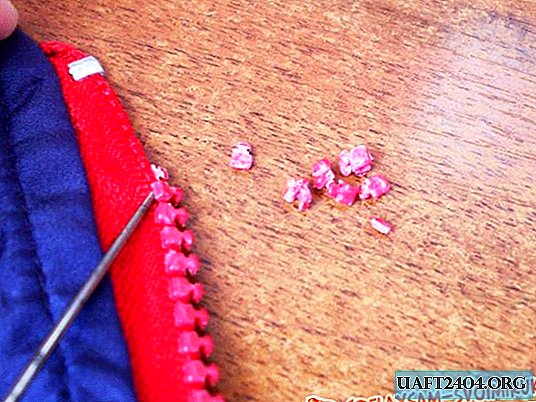
Carefully unbend the metal zipper fastener located at the top of the clasp. This fastener is still needed for a new fastener.

After dismantling the "teeth" and the metal mount, remove the "dog" by sliding it up to the stop.

This is how a thing looks after analyzing a broken zipper: everything is removed, and the fabric base remains in the details of the clothes.

Second stage: customize the new fastener in length.
We put a zipper next to the thing and measure the desired length. We cut the excess so that the length of the new fastener is a couple of centimeters longer than the length of the old one.

Since the fastener should not touch the body in the neck, in the upper part of the zipper it is necessary to pull out the “teeth” on both sides of the zipper in the right place (at the place where the old zipper ended).

We insert metal parts taken out of the old zipper into empty places and with the help of pliers we fix them on a new fastener.

Excess “cloves” are carefully removed with pliers or a large needle.

In order to avoid sprinkling of fabric, cut off the edges of the fastener with a flame of a match or a candle.

Stage Three: we fasten a new fastener to a thing.
We attach a new zipper to the fabric base remaining from the previous fastener (having previously disconnected it). In order to avoid shifts and bevels, you can fasten the fastener and fabric not with pins, but with a basting seam.

We bend the upper edge of the fastener inward (on the one side of the bend is a new zipper, and on the other, the fabric base of the old one). After stitching, the burnt edge of the zipper will not be visible.

The second part of the disconnected lightning is similarly fastened to the second side of the thing.

We sew the fastener in the places of attachment with the fabric base of the old zipper.

That's all! It took about ten minutes to replace the zipper.


In twenty minutes, the costume acquired two new zippers! The work looks neat, the manipulations performed are completely invisible. The most important thing is fast and easy!


Share
Pin
Tweet
Send
Share
Send

