Share
Pin
Tweet
Send
Share
Send
It's time to update the tile in the bathroom. To do this, you need to prepare the walls and floor for further work. Initially, we dismantle the old tile, clean the walls of old paint and plaster or putty that has departed from the masonry. Then all laid out surfaces are primed (preferably concrete by contact). We proceed to the installation of frames for boxes that will close the water and sewer pipes. It is very important not to forget to prepare the places for inspection hatches in places where the meters are installed.
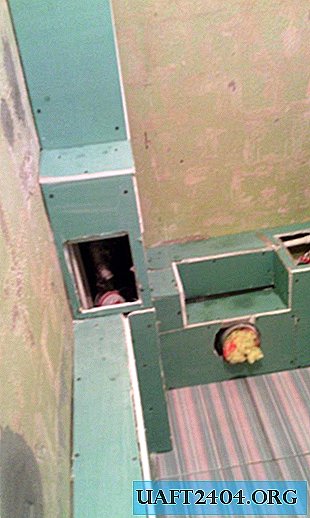
After we sheathe the frames using GCR (better moisture resistant, for obvious reasons). GCR is enough to treat with deep penetration soil. After the preparatory work is completed, we proceed directly to laying out the tiles.
The first thing we do is marking the floor and walls. On each wall we draw a vertical line strictly in the middle, in order to determine what kind of trim will be in the corner. This will determine how to start laying out the tile: from the line in different directions or, skipping it, in the center of the tile. By the same pattern, we mark up on the floor.

A very important point: when laying floor tiles, glue is applied with a notched trowel to both the base and tile. In this case, voids under the tile are not permissible. The work is done with the help of crosses and wedges, the latter help to level the differences in the size of the tile. The floor is laid out in one horizontal plane.

When gluing tiles on the walls, it is very important to lay out the first row evenly - this is the key to a beautiful and even joint in the future.

The external corners are ennobled with plastic corners. Voids under the tiles of the uppermost row are also not allowed, because when mounting profiles for the ceiling, you can get into the void.

Grouting is done the day after the work is completed so that the glue has dried. Otherwise, the tinted grout will not dry evenly and will not be uniform.

Mixtures (glue and grout) are prepared strictly according to the instructions on the packaging. Grout is applied with a rubber spatula, after 10 minutes it is washed off with a sponge moistened with water, diagonally. After 30-40 minutes, the tile is wiped with a dry soft cloth, and all seams are also rubbed with a cloth to remove bumps and sinks.

After this mandatory procedure, smooth, beautiful, and, most importantly, tight seams are obtained. The internal corners remain free of grout, they are sealed the next day with sanitary silicone to the color of the grout or any other at your discretion.

Adhering to these simple rules, you will be satisfied with the new bathroom for a long time.
Share
Pin
Tweet
Send
Share
Send

